
Spirit Laser Engraver
Personalized Clock Application with CCD device | Laser Engraving, Vinyl Cutter, UV Printer - GCC
Applications

Showcase Video
Laser Engraver
Personalized Clock Application with CCD device
GCC LaserPro Application Lab uses the CCD device to make a personalized clock.

Details
Have these matters ever troubled you: doing laser engraving without knowing how to locate the printed material, or causing additional cost by wasting too many materials? Our GCC LaserPro product is your trouble-free solution. By aligning the pen carriage with the registration mark and with the push of a button, our precise CCD device helps you automatically locate the position of the object and performs a precise contour cut accordingly. Its intelligent auto-correction features enables angle corrections even if the material is not placed properly.
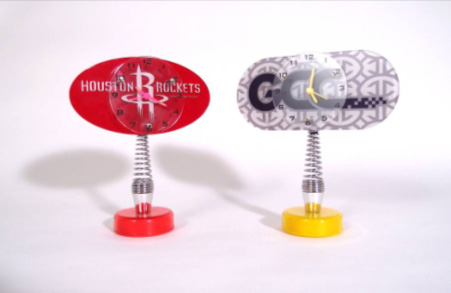
This month, GCC LaserPro Application Lab uses the CCD device to make a personalized clock. All you need to do is to press a button, and the CCD device gets the things done. Let’s follow GCC LaserPro Application Lab to experience how this convenient device works!
Materials needed:
‧ 2mm Acrylic
Instructions:
Step 1. Press the Insert Registration Mark button to add registrations to the graphics.
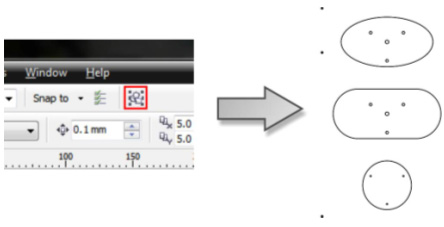
Step 2. Patterns with registration marks are ready for printing by StellarJet.
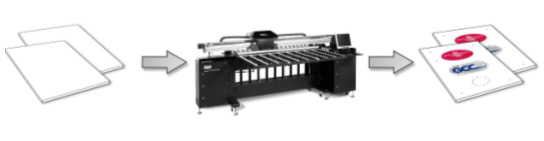
Step 3. Put the printed acrylic on the working table.
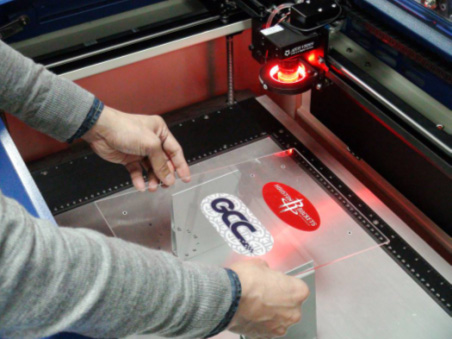
Step 4. Press the Autofocus button for auto-focusing.

Step 5. Move the pen with the red beam to the first registration position.
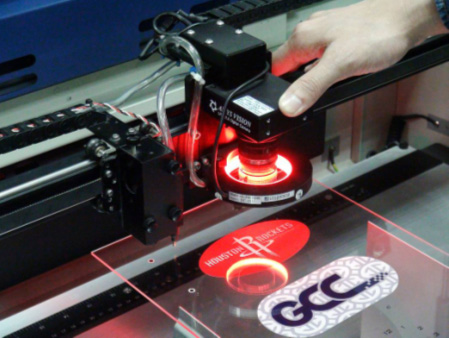
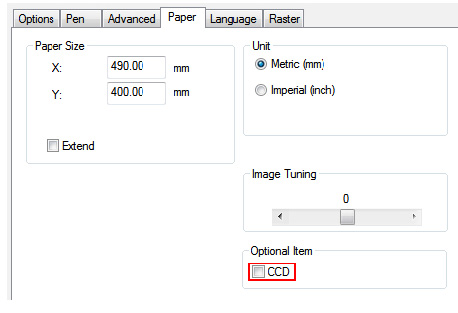
Step 6. Select the CCD function from Driver and send the file to machine.
Step 7. Press “Start” on the control panel or “Execute” from the CCD program to run the file.

Step 8. Assemble the sample.
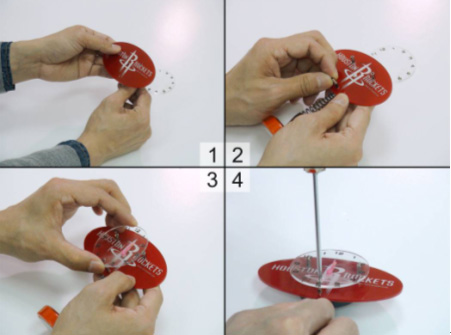
Step 9. Sample completed.
Suggested parameters:
| Spirit 25W | ||||
| Speed | Power | DPI | PPI | Other |
| 2 % | 100 % | 1000 | 400 | Inside out cutting |
*The parameters are for suggestions only and should be moderately adjusted accordingly.
Tips:
- Make sure the locating mark is on the patterns before printing, so that CCD device is located correctly.
- Select CCD on Driver to make CDD device locate properly.
- Select inside out cutting to avoid material falling.